Email Manual Template Configuration
The manual email template is basically for sending email in Bulk to all the database or as desired based on the type of clients the email needs to be sent. For example: if the bulk email is to notify only members or enquires then this can be achieved by sending it to the type of client through Client Database report. For that we need to create email template as Manual so that the bulk email can be sent manually through any report.
Also, as per the latest requirements wherein in the lock-down period, the members are not able to visit the gyms/clubs. In this situation, we can use the bulk email for sharing the workout YouTube videos which will appear after the client clicks on the image shared in the bulk email template.
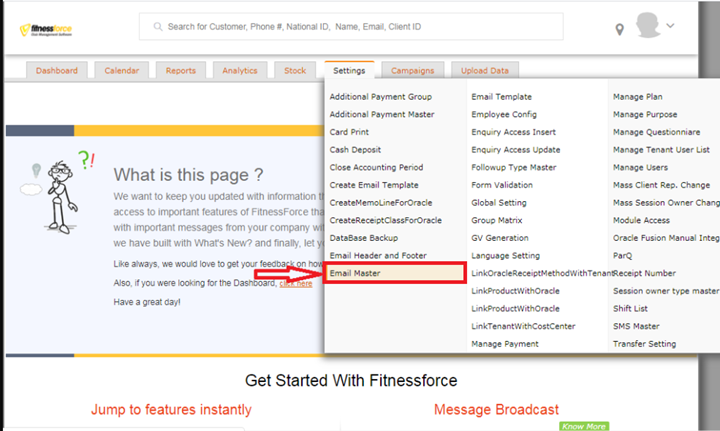
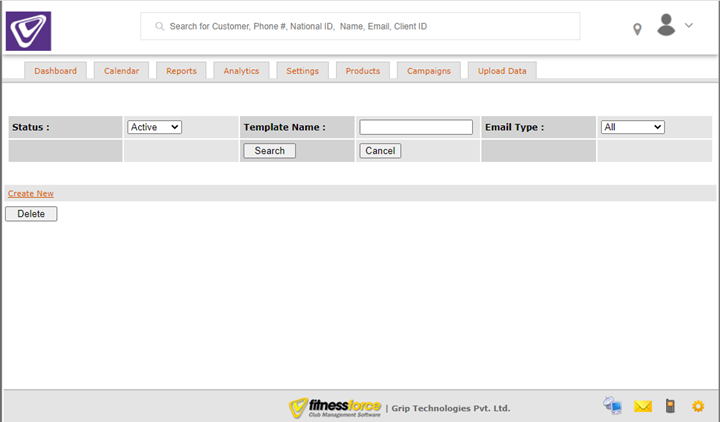
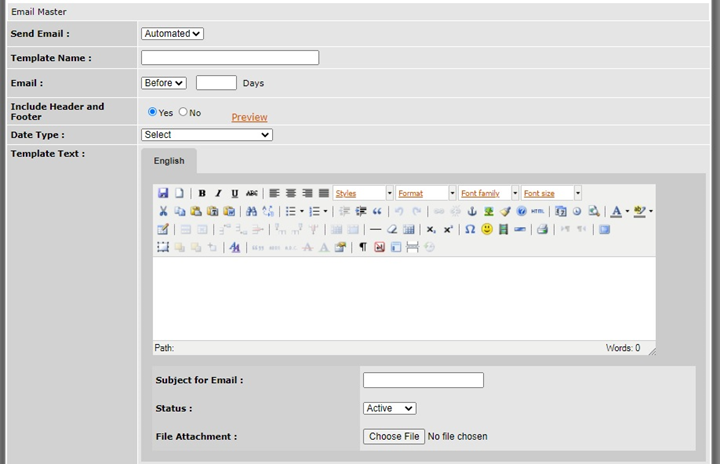
Image after clicking on create new


Kindly find the steps below for configuring the Manual Email Template:
Image of the Setting Tab selection of Email Master
- Go to Settings tab and click on Email Master. Image above for the same.
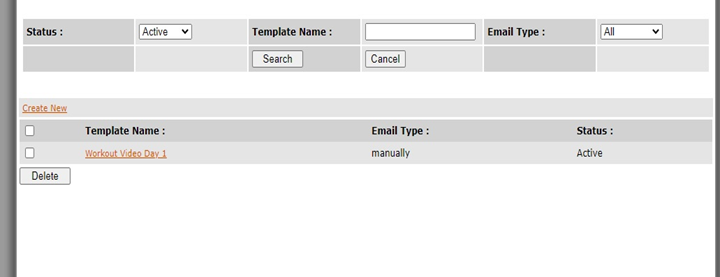
Image for Email Master
- For creation of the Email Template, need to click on the "Create New" Hyperlink.
- After clicking on Create New, the Send email will be selected by default on Automated Email.
- And hence the details below in the image are showing based on the type of email.
- For creating Manual email, change the Send email type to Manual.
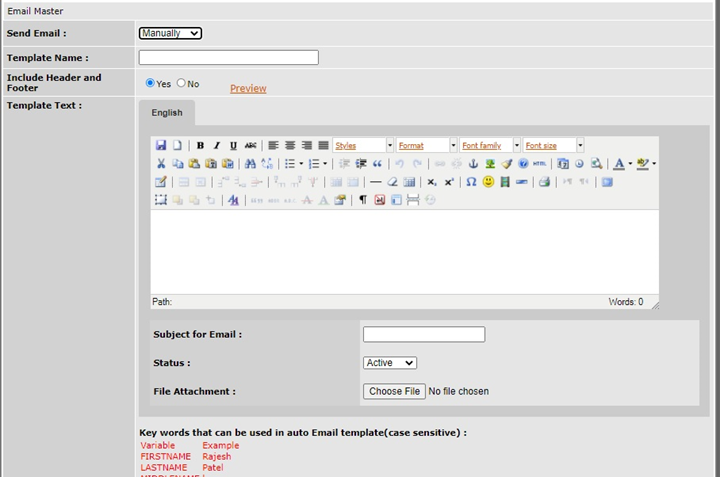
Image of Manual Template type
- Send Email: Once the type is changed from Automated to Manual, the details in the image are changed.
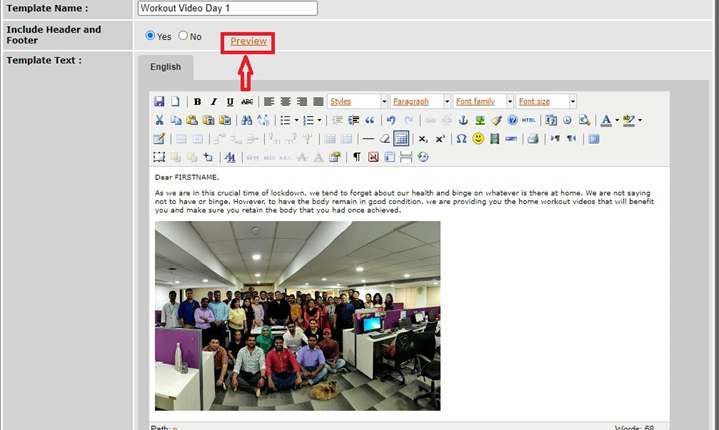
- Template Name: Enter the Template Name for your bifurcation. This will be visible only on the front end as a reference with regards to the template. For example: New Year Offer, Republic Day Offer, Workout of the Day and so on.
- Include Header and Footer: The header and footer of the email also can be added. The configuration for the same is a different setting. If you do not require the header and footer then change the radio button to NO.
- Template Text: This will be the email content and the image that you would like to insert along with any video linked to the image. Note: Similar to SMS template, start the template with "Dear FIRSTNAME," and then the email content. FIRSTNAME is nothing but the variable which will be replaced with the names of the clients to whom the email will be sent.
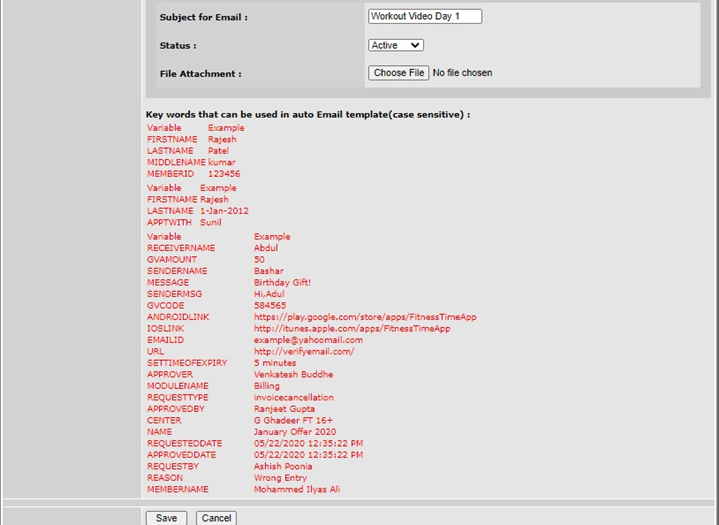
- Enter the Subject line under "Subject for Email".
- In case if you would like to add an attachment there is an option for the same.
- Click on "Save" button.
Image with video
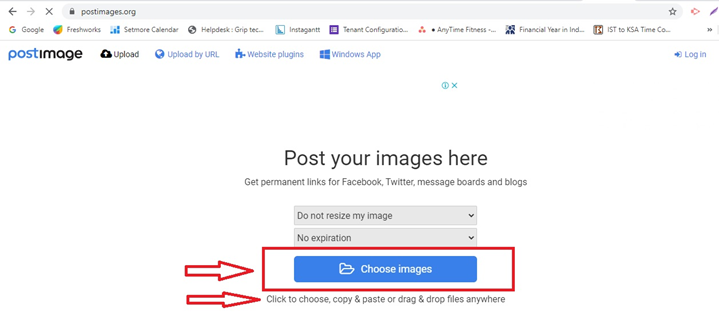
For creating an email with video which has an image and by clicking on the image the client will be directed to the video, kindly use the link below:
Image of the Post Image Application
- Once the desired image has been uploaded in the link above, there will be a set of different URL's.
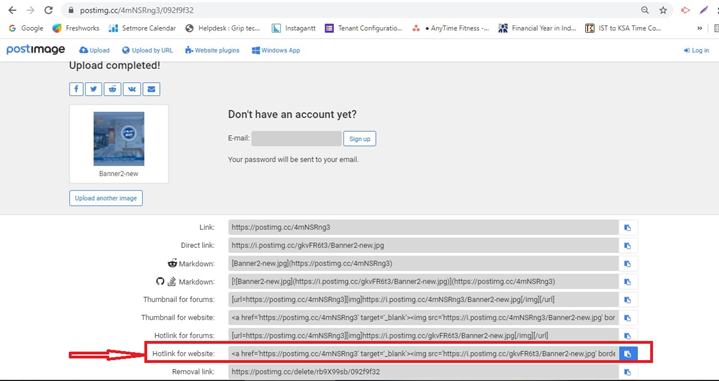
- We need to take the URL highlighted in the image above.
- Copy the HTML by clicking on the icon show in the image which is selected in color blue
Image showing the HTML in box and arrow in black color
- Click on the HTML icon in the FF software to paste the copied link from Post image.
Image of the HTML page in FF after clicking on the HTML icon
Image of the copied HTML link
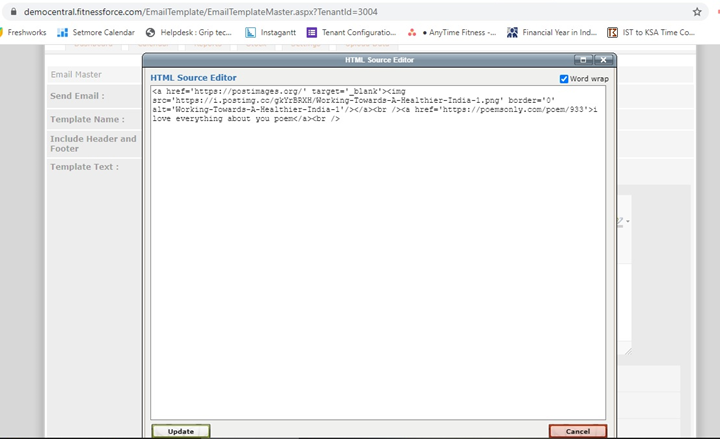
- Paste the link in the HTML page shown in the image above.
- You will get the link similar to mentioned below: <p><a href='https://postimages.org/' target='_blank'><img src='https://i.postimg.cc/gkYrBRXH/Working-Towards-A-Healthier-India-1.png' border='0' alt='Working-Towards-A-Healthier-India-1'/></a><br /><a href='https://poemsonly.com/poem/933'%3Ei love everything about you poem</a><br />
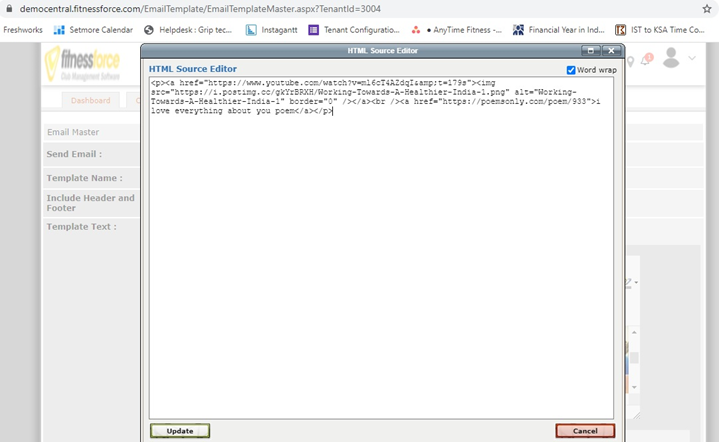
- Replace the first part of the link mentioned in between the <> with the YouTube video link as shown below: ><a href="https://www.youtube.com/watch?v=ml6cT4AZdqI&t=179s%22%3E%3Cimg src='https://i.postimg.cc/gkYrBRXH/Working-Towards-A-Healthier-India-1.png' border='0' alt='Working-Towards-A-Healthier-India-1'/></a><br /><a href='https://poemsonly.com/poem/933'%3Ei love everything about you poem</a><br />
Image of the uploaded link in the HTML page
- Once the link has been pasted, click on the update button.
- Once the update button is clicked , that's how the image gets visible as shown in the image.
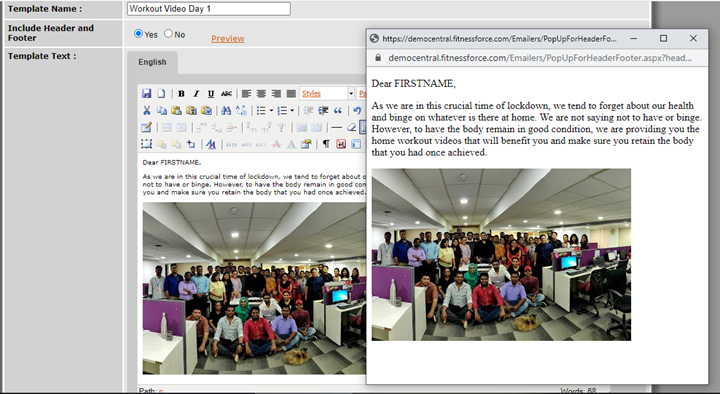
- You can click on Preview button to view the image updated in the HTML.
The image above shows the preview image
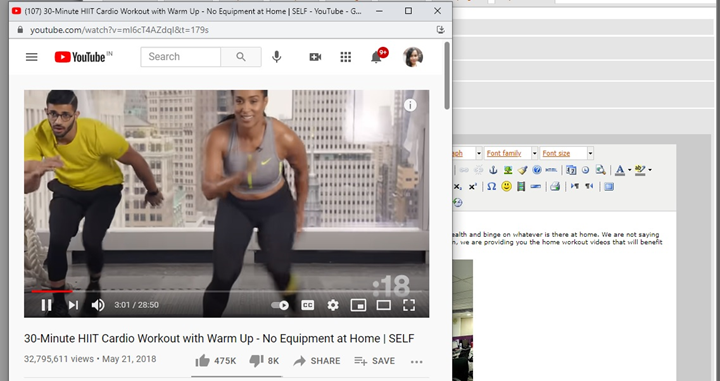
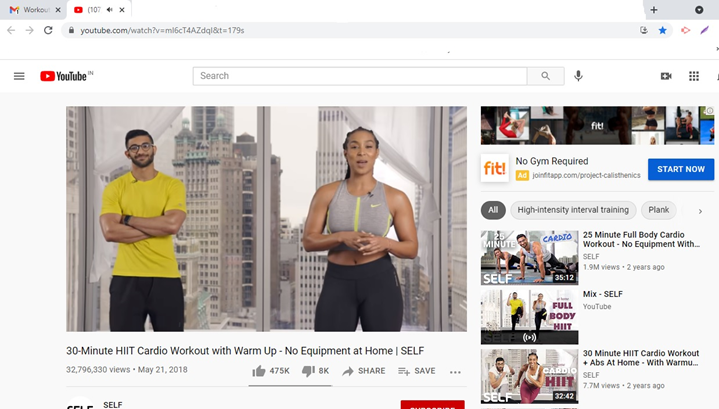
- You can also try clicking on the image to check whether the video is getting loaded or not.
- As you can see in the image above, after clicking on the image it gave us the workout video.
- Close the tab and complete the remaining details to be entered.
- Subject for Email: The subject line is what the client will be receiving as an email subject line.
- Status: This needs to be active so that the template can be visible in the report for sending in bulk.
- File Attachment: In case you want to attach any file or doc even that can be done.
- Once the above setting is completed, click on the save button.
Image of the manual template configured
Sending Email in Bulk
The email can be sent in bulk to all the client or to specific as per requirement. For example: Expired memberships, Balance.
Below are the steps on how to sent the email in bulk:
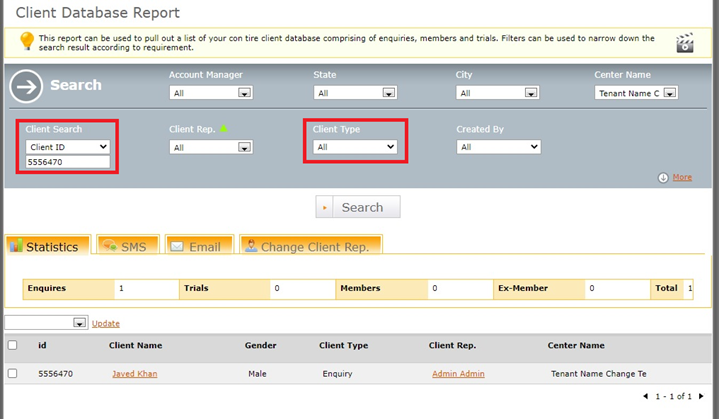
- Go to Report - Client Database report
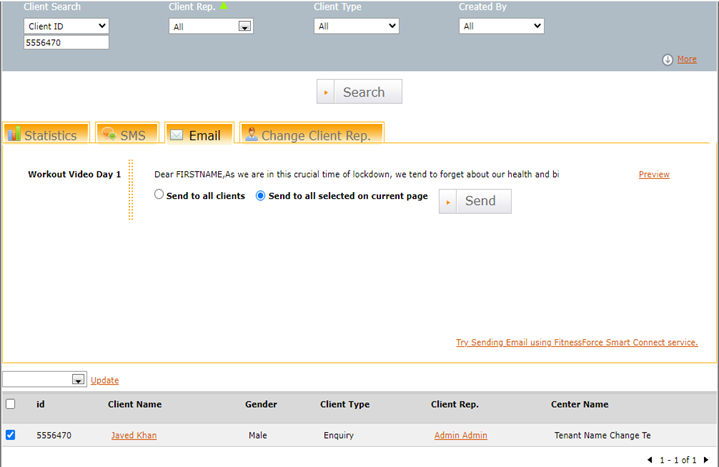
- If the email needs to be send to all clients then let the “Client Type“ be as “All”, or else the Client Type can be selected based on Enquiry or Member.
- In the image above is shown for sending a particular client, you can search the client by the “Client Search” field. By Name, number, client ID.
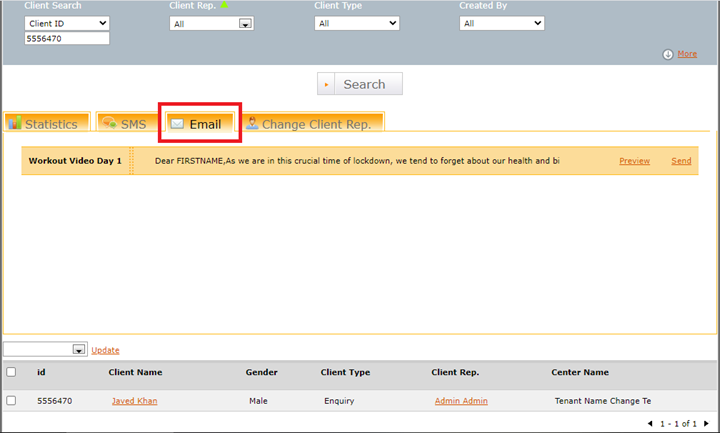
- Once you have selected Client Type or searched the client, click on the Email button as shown in the image.
- You can also view the manual email template that has been configured.
- Click on the Send hyperlink which is reflecting in the template right hand side.
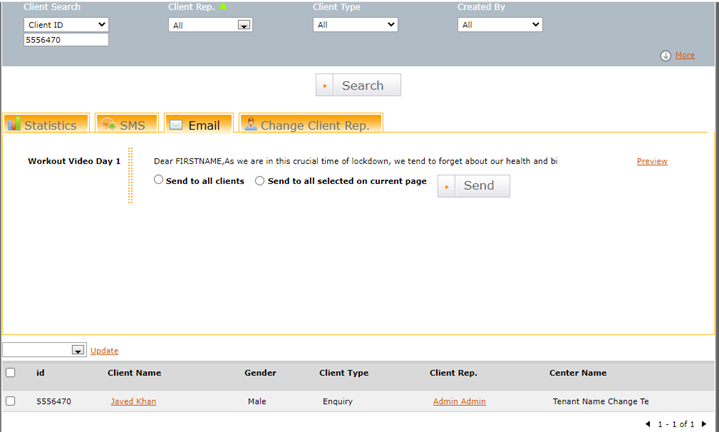
- After clicking on the send hyperlink, the above image shows the selection for either sending to all or sending for selected clients.
- As per the example, select the second option.
Image of the selection
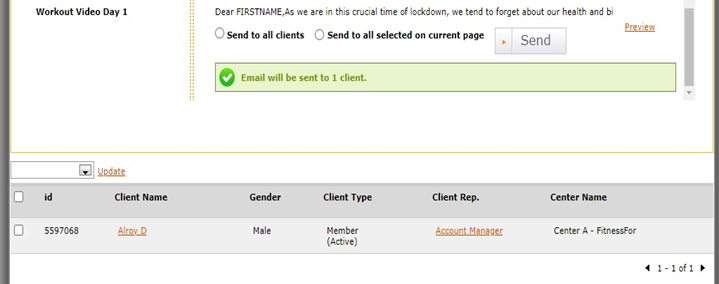
Image of after the Send button has been clicked.
- Once the Send button is clicked, in a few seconds there will be a message box in green as shown in the image stating “ Email will be sent to 1 client. “. The number 1 is depending on how many clients the email has been sent.
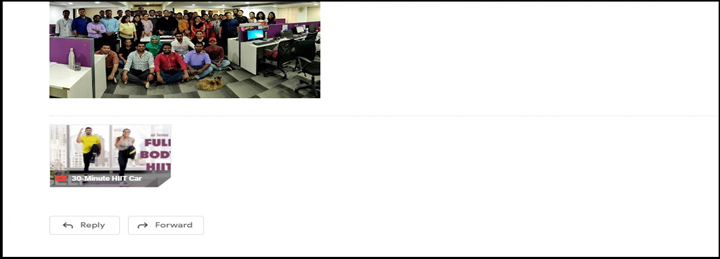
Image of the email received by the client
- Image above shows how a member will receive the email.
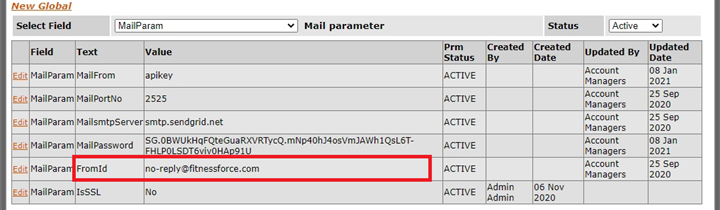
- As you can see the no-reply, this can be changed by the centre, Email ID.
- The setting is under the global setting Mail Param.
- Above image is of the Mail Param in which the email ID of the centre can be changed which is marked in the red box.
- The above images are the email content received by the client.
- The above image is of the video after clicking on the image received on the email.
Reports for reference:
1. Email Transactional Report: https://support.fitnessforce.com/portal/en/kb/articles/email-transactional-report-6-1-2021
2. Email Summary Report: : https://support.fitnessforce.com/portal/en/kb/articles/email-summary-report-6-1-2021
Related Articles
Live email configuration
An email template refers to designing or documenting an email and save the same so that it can be used while sending your daily messages to clients. This enables save creation time, as the same template can be used every time, an email of same nature ...Manual follow-up configuration
Manual follow-up types are those follow ups which will need to be opened by the staff whenever required and will reflect on the Dashboard of the staff as per the date selected manually. This type of Follow-up will give you a convenient classification ...Email transactional report
This report provides you the individual status of each email sent in a particular date range. How to check the email transaction report Refine your search based on which centre, state, city and under which account manager you want to check the ...Email summary report
This Report provides you the summary of all Emails sent for the selected time period. This report will not give you the status of a particular email sent. For the same refer to the email transactional report. You can also retry or cancel sending an ...Manual SMS
Manual feature enables you to send SMS to your clients as and when you wish. Manual SMS can be sent either for pending balance or informing clients about a new offer/campaign or the gym being closed for maintenance. How is a SMS template ...